Hey there, so you’re working with self-tapping inserts, right? Maybe you’re a manufacturer sourcing them for your plastic parts, or a fabricator tired of fasteners that strip mid-assembly. I’ve been in the game supplying self-tapping inserts for over 8 years now, and let’s be real—most guys who buy these don’t really know how to tell a dud from a quality part at first glance. At the start, I saw way too many clients waste time and cash on inserts that worked for 10 parts then crapped out on the 11th. That’s why I put together this no-BS guide to checking insert quality, straight from a supplier who’s fixed more than a few messes because of bad inserts. Self-Tapping Inserts

First off, let’s get one thing straight: self-tapping inserts aren’t all made the same. The cheap ones from overseas that pop up on Alibaba? A lot of the time, they’re made with low-grade steel, they skip critical thread forming, or their surface coating is thinner than a sheet of paper. Now, don’t get me wrong—you don’t need a lab to check these, but there are a few key things anyone can do, no fancy equipment required. I’ll break this down into things you can do before you even touch the insert, then when you install it, and then after you’ve run a few test assemblies. That way, you don’t waste time on guesswork.
Let’s start with the basics: material. Most self-tapping inserts are either carbon steel (the workhorse for most applications) or stainless steel (for wet or corrosive environments). If you’re buying carbon steel inserts, the last thing you want is something that rusts before you even get it on the shelf. How do you check that? Grab a magnet—wait, no, wait. Carbon steel is magnetic, right? But cheap low-carbon steel is softer, and it’ll stick to a magnet just as much as high-carbon steel. The real test is the surface coating. Quality inserts get a zinc plating, usually, that’s around 5 to 8 microns thick. The cheap ones might have a flash zinc coat—like, 1 to 2 microns—so thin you can scratch it off with your fingernail. Next time you get a batch, take a few, run the edge of a nickel coin across them. If the coating comes off and leaves a gray mark, that’s a bad batch. The good ones will resist that scratch, no mark. For stainless steel inserts? Obviously, they won’t rust, but some cheap ones use 200 series stainless that’s not actually corrosion-resistant, it just looks like 300 series. A quick test here is to leave a few inserts in a cup of water for 24 hours. If they get tiny rust spots? Pass, that’s garbage. We test every single coil of stainless we get before we even make inserts from it, because 200 series is a nightmare for our clients in food or marine industries.
Next up, thread profile. Self-tapping inserts work by cutting their own thread into plastic, right? So if the internal or external threads are messed up, they’ll either not seat right, or strip the plastic. I can’t tell you how many times a client has sent me a photo of an insert that looks fine, but when you measure the threads with a caliper, they’re off. Let’s keep this simple: don’t use a fancy micrometer unless you want to, but a basic digital caliper (you can get one for $20 at Home Depot) works. For example, if you’re making M5 inserts, the external thread’s root diameter should be around 4.2mm, give or take 0.05mm. If it’s 4.0mm or 4.5mm, that’s a problem. Why? Because the tapers on the external thread—those little cutting points at the front of the insert—they have to be shaped just right. Cheap inserts have those tapers either too steep (so they dig into the plastic too fast, split it) or too shallow (so they take forever to seat, and cross-thread). Another easy trick: roll the insert across a flat surface, like a workshop table. If it wobbles? The thread pitch is off, or the insert is not perfectly cylindrical. Wobbly inserts = bad performance, no question. We had a client last year who had 3000 parts get scrapped because of this—their inserts were wobbly, so when they torqued the screw, they tilted and stripped the plastic boss. That’s the kind of mistake you can avoid in 10 seconds.
Then there’s the surface finish, specifically the lead-in chamfer at the bottom of the insert. Quality self-tapping inserts have a smooth, bevelled chamfer there, so when you drive the screw in, it guides it straight, no cross-threading. Cheap inserts have a sharp, burr-filled edge there, or no chamfer at all. How to check that? Run your thumbnail gently along the lead-in. If you catch it, that’s a burr. Bad. A smooth chamfer lets the screw seat straight, even if the operator is a little off with the drill hole alignment. We once had a client who was using inserts without a good chamfer, and their line had a 12% cross-thread rate. Switched to our inserts, and that dropped to 0.2%. That’s the kind of win that makes the call worth it.
Now, let’s move to installation testing—this is where 90% of the real quality checks happen, right? Because an insert can look perfect, but when you put it in plastic, it’s garbage. First, test the drill hole size. That’s non-negotiable. If the hole is too big, the insert spins. If it’s too small, the plastic cracks. We give all our clients a spec sheet that says exactly what drill bit to use for each insert size. For example, for our M5 inserts for ABS plastic, it’s a 4.8mm drill bit. If you use a 5.0mm bit, that’s a 30% chance the insert will spin. How to test this? Do a dry run first, no screw even—just press the insert into the hole with a manual press, or a small torque driver set to low. The insert should seat flush, no gaps. If it sticks out, the hole is too small, or the insert’s length is off. Wait, length! Another thing to check: if you order a 10mm insert, make sure it’s exactly 10mm long. Cheap inserts might be 9mm or 11mm, so when you seat them, they don’t go all the way in. Use that caliper again—measure a few inserts from the batch, not just the ones on top. I always tell clients to take 10 random inserts from a new batch, don’t just grab the first off the pallet. Top ones might be good, bottom ones are rejects.
Then, the big one: torque testing. That’s how you measure how well the insert grips the plastic. Grab a torque wrench, or if you don’t have one, use a drill with a torque setting (most cordless drills have that now). Screw a test screw—same size as the insert—into the insert, then screw it out. The torque it takes to turn it out is the pull-out torque. For most consumer applications, you want that to be at least 2 Nm for M5. For industrial stuff, 4 Nm minimum. If it’s less than that, the insert is bad, or the plastic is too soft, but usually, it’s the insert. Wait, also, do this test 5 times with the same insert. If the torque drops by more than 20% after the first screw, that means the insert is wearing out. Quality inserts hold their torque for multiple cycles. We did a test last quarter with a batch of our inserts: 5 cycles, torque went from 4.2 Nm to 3.9 Nm. The cheap overseas ones we tested? First cycle was 1.8 Nm, fifth was 0.7 Nm. That’s a huge difference for someone building appliances or furniture, where you might have the service tech assembling and disassembling parts for repairs.
Another installation test: pull test, if you can. If you have a pull tester (even a manual one), pull the screw straight out of the insert. The force required to pull it out should be way higher than the torque. If the plastic boss breaks before the screw comes out, that’s a good insert. If the insert spins in the hole and the screw pulls out with no resistance, that’s garbage. That’s exactly what happened with that client I mentioned earlier—their inserts had a pull force of only 800 N, and when their test required 1200 N, the inserts spun. We gave them inserts with 1500 N pull force, and they passed all their tests.
Wait, I should also mention batch consistency. That’s something a lot of people miss. It’s not just checking one insert, it’s checking 10, 20, even 50 from the same batch. A bad batch of inserts might have 5 good ones and 5 bad ones, which means you’ll have random failures in your production line. How to check consistency? We test every batch we ship by pulling 5 random inserts, measuring their threads, their coatings, their lengths, doing the torque test on each, and if any are off, we reject the whole batch. That’s why we’ve got repeat clients who’ve been with us for years—they know every insert they get from us is the same, no surprises.
Also, let’s talk about common red flags that come up. If a supplier quotes you inserts for way less than everyone else, that’s a red flag. Like, if the going rate for M5 inserts is $0.20 each, and someone offers you $0.05 each, they’re cutting corners, no question. We don’t do rock-bottom pricing because we use premium steel and follow ISO standards, and our clients know that paying a little more upfront saves them from scrapping parts, dealing with returns, and wasting labor. Another red flag: no spec sheet, no test data. If a supplier can’t tell you the coating thickness, the material grade, the torque rating of their inserts, walk away.
Wait, should I mention environmental testing? Yeah, if you’re using inserts for outdoor or automotive applications, that’s important. Leave a batch of inserts in a hot box (60°C or 140°F) for 72 hours, then test their torque. If it drops by more than 15%, they’re bad for that kind of use. Cold testing too—leave them in a freezer (-20°C or -4°F) for 24 hours, same test. We do that for all our inserts that go into automotive or outdoor gear, because those environments kill cheap inserts. For example, a lawnmower part that’s left in the sun all summer needs inserts that don’t rust or lose torque. We test that before shipping.
I’ve had so many clients come to me after a bad batch, saying they lost thousands in downtime. One guy a few months back had a custom furniture line that stopped production for 3 days because their insert supplier gave him ones that spun. He called us on a Wednesday, we had a rush order ready by Friday, and he was back to running full production over the weekend. That’s why we’re transparent with our quality checks—we want our clients to trust that when they get an insert from us, it’s going to work, no matter what.
Let’s wrap this up. The key points, in case you skipped ahead: check the material and coating with a scratch test and magnet, inspect the thread profile and chamfer with a caliper, roll inserts to check for wobble, do installation and torque tests, test consistency across the batch, and watch for red flags like way too-low pricing and no test data.
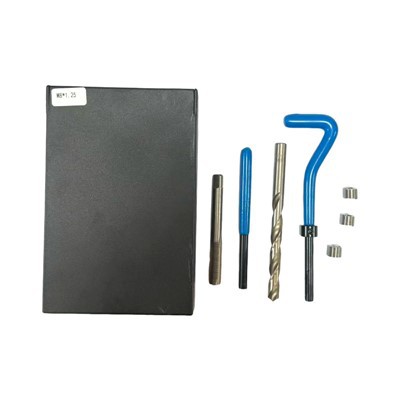
If you’re tired of dealing with self-tapping inserts that fail, spin, or strip, don’t guess—reach out. We’ll send you a free sample pack, so you can run all these tests yourself, no pressure. No runaround, just real data, because we’ve been in the trenches fixing insert messes for years.
Thread Repair Kit References:
- Plastics Design Library. Insert Molding Handbook. 3rd Ed., William Andrew Publishing, 2018.
- ISO 10243:2018, Plastics – Determination of torque strength of metal inserts for thermoplastics. International Organization for Standardization, 2018.
- Shigley, J.E., et al. Mechanical Engineering Design. 11th Ed., McGraw-Hill, 2020.
Locking Inserts Technologies Co., Ltd.
As one of the most professional self-tapping inserts manufacturers and suppliers in China, we’re featured by quality products and good service. Please rest assured to wholesale bulk self-tapping inserts in stock here from our factory. Also, custom service is available.
Address: 205, 2/F, Bldg. A8, Zhizaogu Ind. Park, No.26 Xingye 5th Rd, Bao’an Dist., Shenzhen, Guangdong, P.R.China
E-mail: sales@lockinginserts.com
WebSite: https://www.lockinginserts.com/
